Introduction to Propagation by Stem Cuttings
Propagation by stem cuttings is an accessible, cost-effective, and rewarding method of growing new plants, suitable for home gardeners and plant enthusiasts at every skill level. It involves selecting healthy growth from a parent plant, encouraging the cutting to develop roots, and nurturing it until it becomes independent. This article provides you with a clear, step-by-step guide to successfully propagate plants from stem cuttings, plus helpful insights on environmental conditions like humidity, temperature, lighting, and watering requirements to maximize propagation success.
Why Choose Stem Cutting Propagation?
Propagation via stem cuttings offers several distinct advantages for home gardeners:
- Cost Efficiency: Use existing plants to propagate new ones without additional costs.
- Cloning Desired Traits: Accurately replicate a favorite plant’s features (colors, flowers, growth habit).
- Environmental Sustainability: Reduce waste and enhance plant multiplication organically, contributing to a healthier gardening practice.
- Speed and Simplicity: This easy-to-follow technique typically results in rooting success within 2–6 weeks, depending on species and care.
Tools and Materials Required
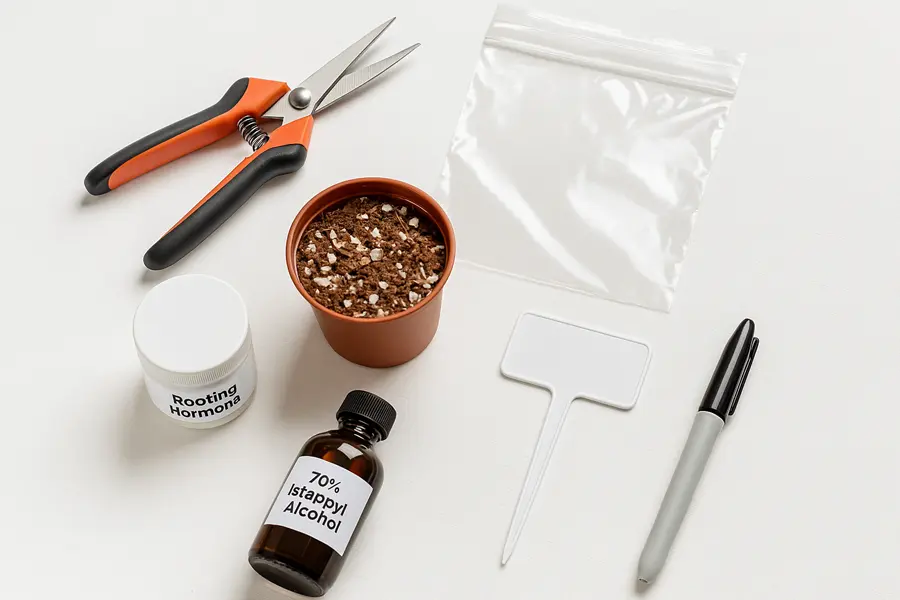
Gathering your supplies beforehand ensures a smooth propagation process. Here’s a concise list of essential tools:
- Sharp Pruning Shears or Scissors: These promote clean, neat cuts, reducing damages that encourage infection.
- Rooting Hormone: While optional, rooting hormone increases success rates and accelerates root growth.
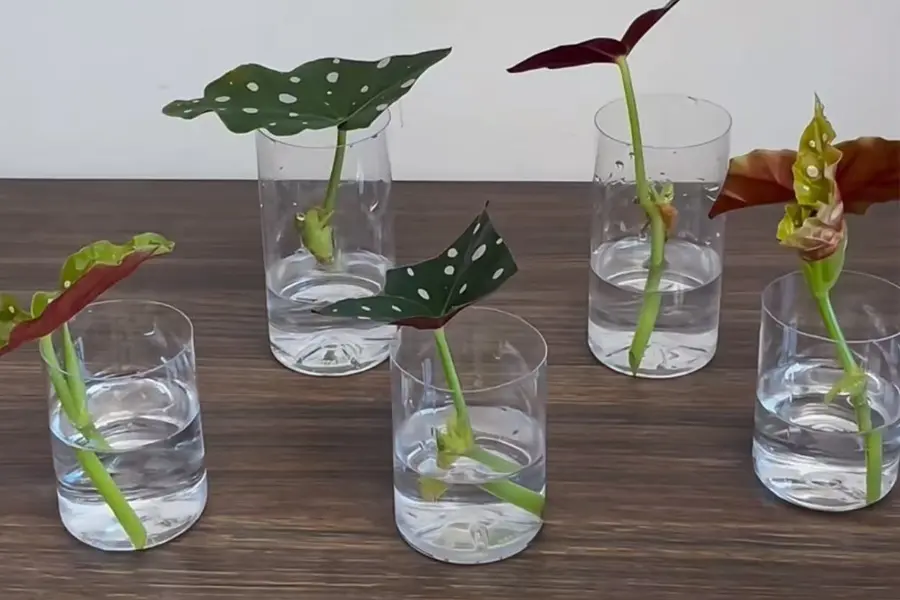
- Well-draining Potting Medium: Use a blend of peat moss, perlite, vermiculite, or quality potting soil to maintain proper moisture and airflow. Or you can simply using water and proper-size water bottle instead.
- Sterilizing Agent (70% Isopropyl Alcohol): Ensure all garden tools remain sterile, reducing bacterial transfer or fungal infections.
- Small Pots or Containers (4–6 inches): Small-sized pots help manage soil moisture effectively and reduce the risk of overwatering.
- Clear Plastic Bags or Humidity Dome (optional): Used to maintain consistent humidity levels, facilitating quicker root growth.
- Labels and Markers: Clearly labeling cuttings will assist tracking and organization, particularly when propagating several plant varieties.
Step-by-Step Guide to Propagate Plants from Stem Cuttings(Take Begonia maculataRaddi as the example)
Step 1: Choose Healthy Parent Plants
Always select vigorous, disease-free parent plants with healthy growth, strong foliage, and no visible pests or diseases. Ideally, take cuttings early in the morning when plant cells are firm and hydrated.
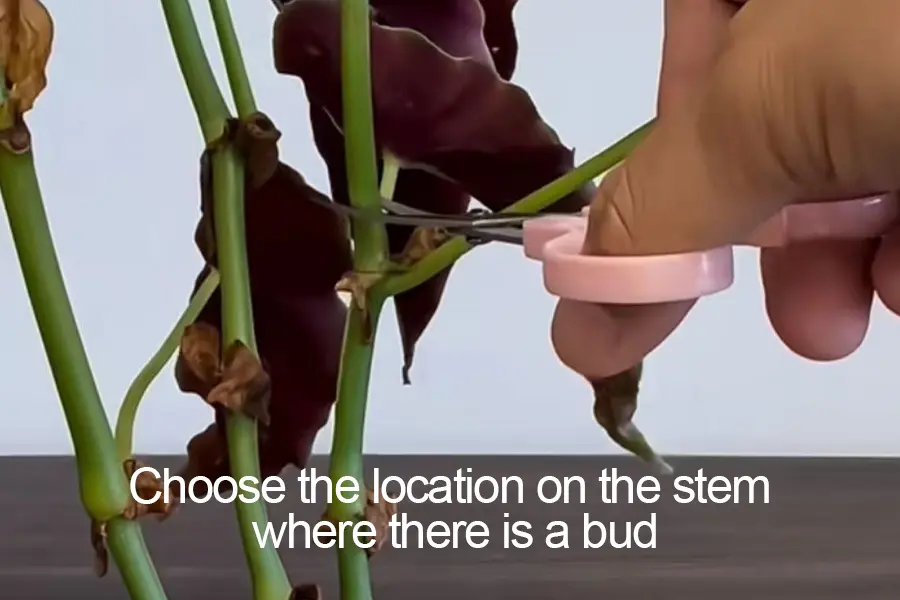
Step 2: Make Proper Cuts
Locate healthy stems with recent growth, preferably softwood or semi-hardwood (young, flexible stems or stems becoming slightly woody). Using sterilized shears, make your cut approximately 4–6 inches in length, just below a node—where leaves and buds emerge. Cut at a 45-degree angle to increase the area for nutrient and moisture absorption, which promotes faster rooting.
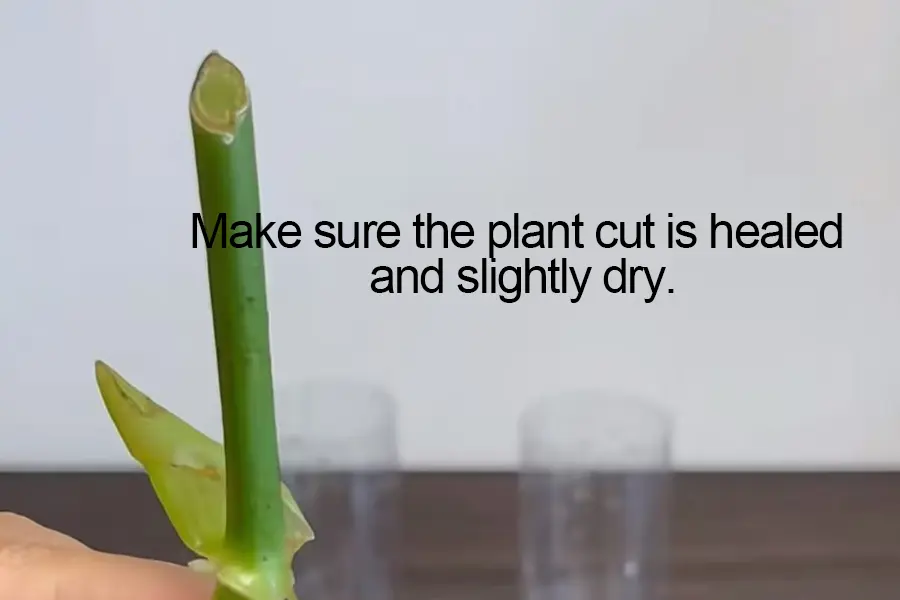
Step 3: Prepare the Cutting
After removing your cutting, promptly trim the bottom foliage, leaving one or two pairs of leaves at the top. Removing lower leaves helps reduce moisture loss and prevents leaves from rotting once inserted into the soil. If large leaves remain, cut them in half horizontally to reduce water loss through evaporation.
Step 4: Apply Rooting Hormone (Optional but Recommended)
Applying rooting hormone significantly enhances root growth, shortening rooting periods by 1–2 weeks. Simply dip the base (approximately the bottom inch) of the cutting into the powdered or liquid rooting hormone. Remove any excess to avoid fungal infections.
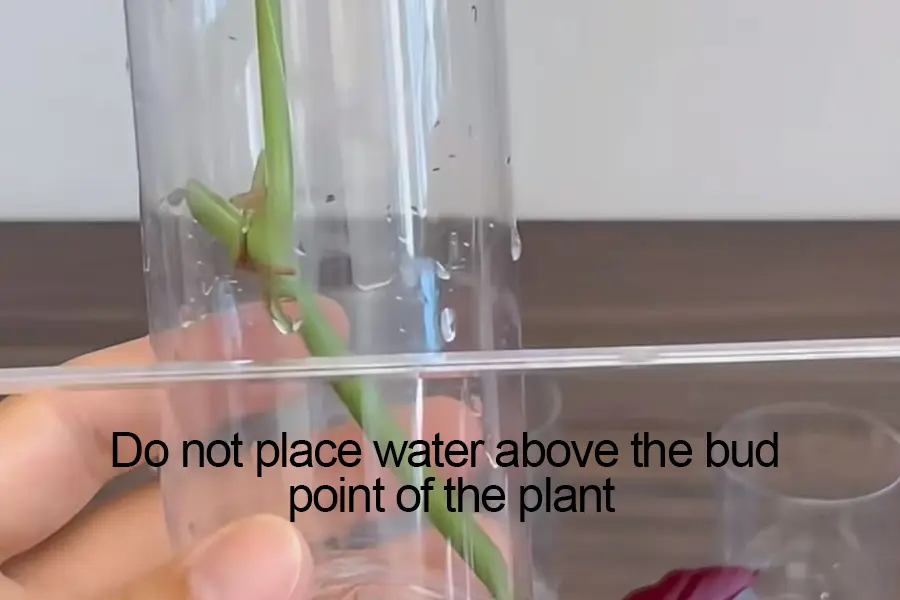
Step 5: Insert Cutting into the Growing Medium
Fill your small container with moistened rooting medium. Create a small hole (around 2 inches deep) and gently insert the cutting so that at least one node is below the surface. Firmly press the medium around the stem. If rooting multiple cuttings, space them evenly apart—approximately 2–3 inches—to ensure airflow and prevent disease.
Step 6: Maintain Proper Humidity and Moisture Levels
Immediately after potting, mist the foliage evenly to maintain adequate moisture. If your environment’s humidity is below 50%, cover the pot loosely with a clear plastic bag or dome to maintain humidity levels between 70–90%. Remove the cover briefly daily or every two days for approximately 5–10 minutes to prevent fungal infections and circulate fresh air. Most plants have this environmental requirements for cuttings, but our Begonia maculataRaddi do not require this operation.Some Type pf begonias are very easy to survive.
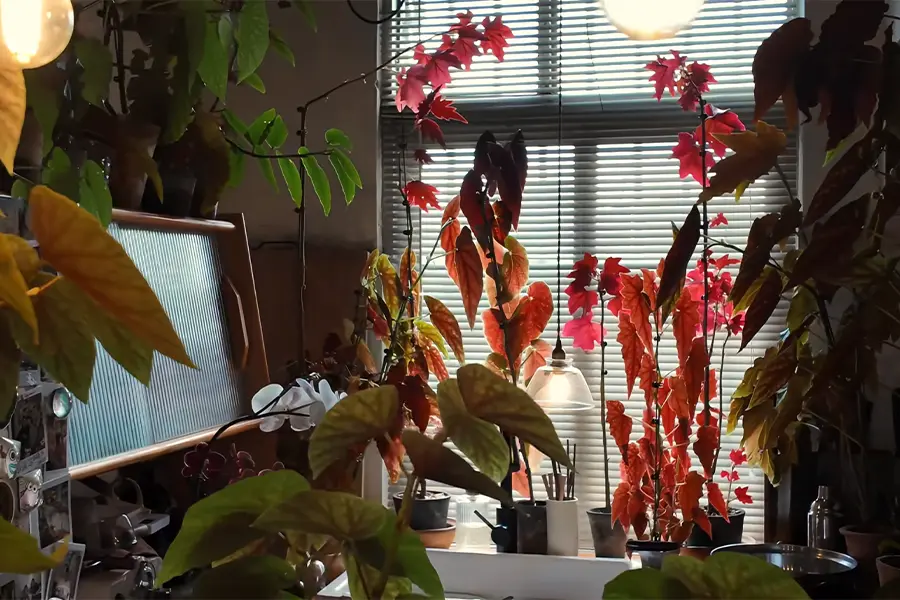
Step 7: Provide Appropriate Light and Temperature
Place cuttings in a warm, bright location with indirect sunlight (avoiding direct sunlight which can stress and dry out tender cuttings). Provide consistent temperatures of 65–75°F (18–24°C), which encourage quick and healthy rooting. Avoid locations near drafts, heaters, or air conditioners, as extreme temperatures hinder root development.
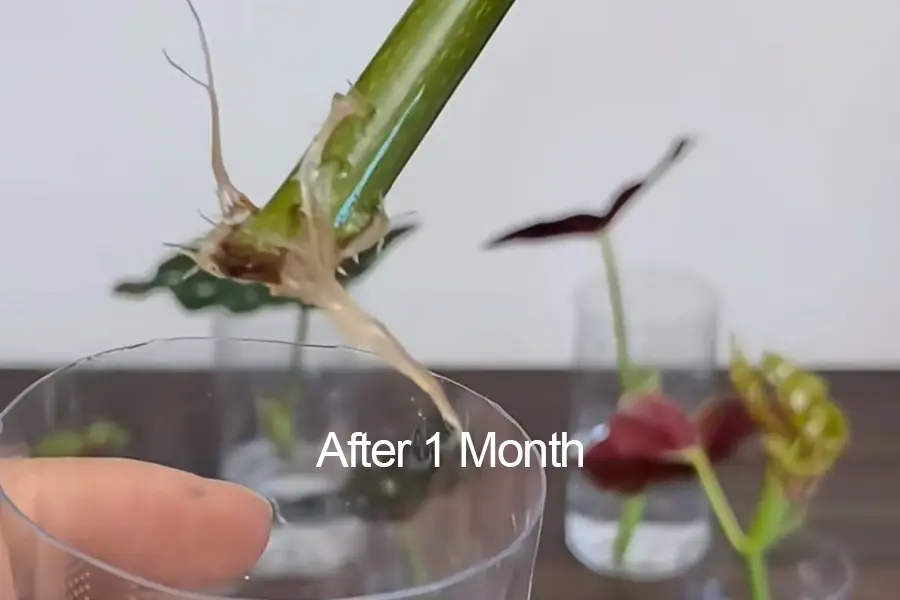
Step 8: Wait and Monitor Root Development
Root development typically occurs within 2–6 weeks, varying based on plant type, species, and growing conditions. Regularly monitor cuttings by lightly tugging the stem after 3 weeks. Resistance indicates successful root formation. Avoid disturbing the cutting unnecessarily to prevent root damage.
Step 9: Transplant to Individual Containers
Once robust root systems have developed (typically after 4–6 weeks), transplant cuttings to individual pots with a quality, well-draining potting mixture. Transition cuttings gradually to their new habitat, progressively introducing brighter indirect sunlight and adapting to lower humidity.
Post-Propagation Care Conditions
Watering and Humidity
Initially, soil should be kept slightly moist but never oversaturated. Overwatering risks root rot and fungal diseases. Ensure excellent drainage and watering only as necessary. Maintain humidity at around 50–70% after propagation to ensure stable growth.
Lighting
Newly rooted plants prefer locations receiving indirect bright light, ideally providing around 10,000–15,000 lux intensity. Gradually adjust plants to brighter lights over several weeks depending on species requirements—avoid sudden changes, which may overwhelm young plants.
Temperature and Air Circulation
Maintain optimal growing room temperatures between 60–80°F (15–26°C). Proper air circulation reduces fungal infections, insects, and diseases. Ensure adequate airflow but avoid direct drafts.
Nutrient Requirements
Newly rooted plants require only mild feeding. After 4–6 weeks post-transplantation, fertilize sparingly with a balanced, diluted fertilizer (use ¼ to ½ of the recommended strength initially) to support healthy growth without stressing developing root systems.
Common Plants Suitable for Stem Cutting Propagation
While many plants respond exceptionally well to stem cutting propagation, these common choices are particularly well-suited to beginners:
- Pothos (Epipremnum aureum)
- Jade Plant (Crassula ovata)
- Geraniums (Pelargonium spp.)
- Rosemary (Rosmarinus officinalis)
- Philodendron (Philodendron spp.)
- Basil (Ocimum basilicum)
- Spider Plant (Chlorophytum comosum)
Conclusion
Propagation via stem cuttings offers valuable opportunities for beginners and experienced plant enthusiasts alike to expand their garden collection cost-effectively and sustainably. Proper care ensures successful rooting with healthy growth, following precise techniques and environmental guidelines outlined above. Garden enthusiasts seeking quick, simple propagation methods with high success rates will find stem cuttings immensely beneficial.
References
- Hartmann, H. T., & Kester, D. E. (2014). Plant propagation: Principles and practices (8th ed.). Pearson Education.
- Toogood, A. (2019). Propagating plants: How to create new plants for free. Dorling Kindersley Limited.
- Davies, F. T., Geneve, R. L., Wilson, S. B., Hartmann, H. T., & Kester, D. E. (2018). Hartmann & Kester’s Plant Propagation: Principles and Practices (9th ed.). Pearson Education.

1 thought on “How to Propagate Plants from Stem Cuttings (Step-by-Step)”
Very Nice Guide, Thx